Gatsby Starter Qiita
10分でできる! @ngrx/storeチュートリアル with @ngrx/schematics
2018/07/30

なにこれ
Angularで状態管理する方法をざっくり把握するためのチュートリアルです。@ngrx/storeベースの簡単なアプリ(数をカウントするアプリ)を作成します。作るだけなら10分程度で出来上がるので、とりあえず手を動かしてngrxを最低限を把握したい人向けです。ソースコードもGitHubに置いているので参考にしてください。
ngrxを使うとボイラープレートが非常に多くなりますが、今回のチュートリアルでは@ngrx/schematics を使い、ボイラープレートを自動生成することで極力手間を省いています。
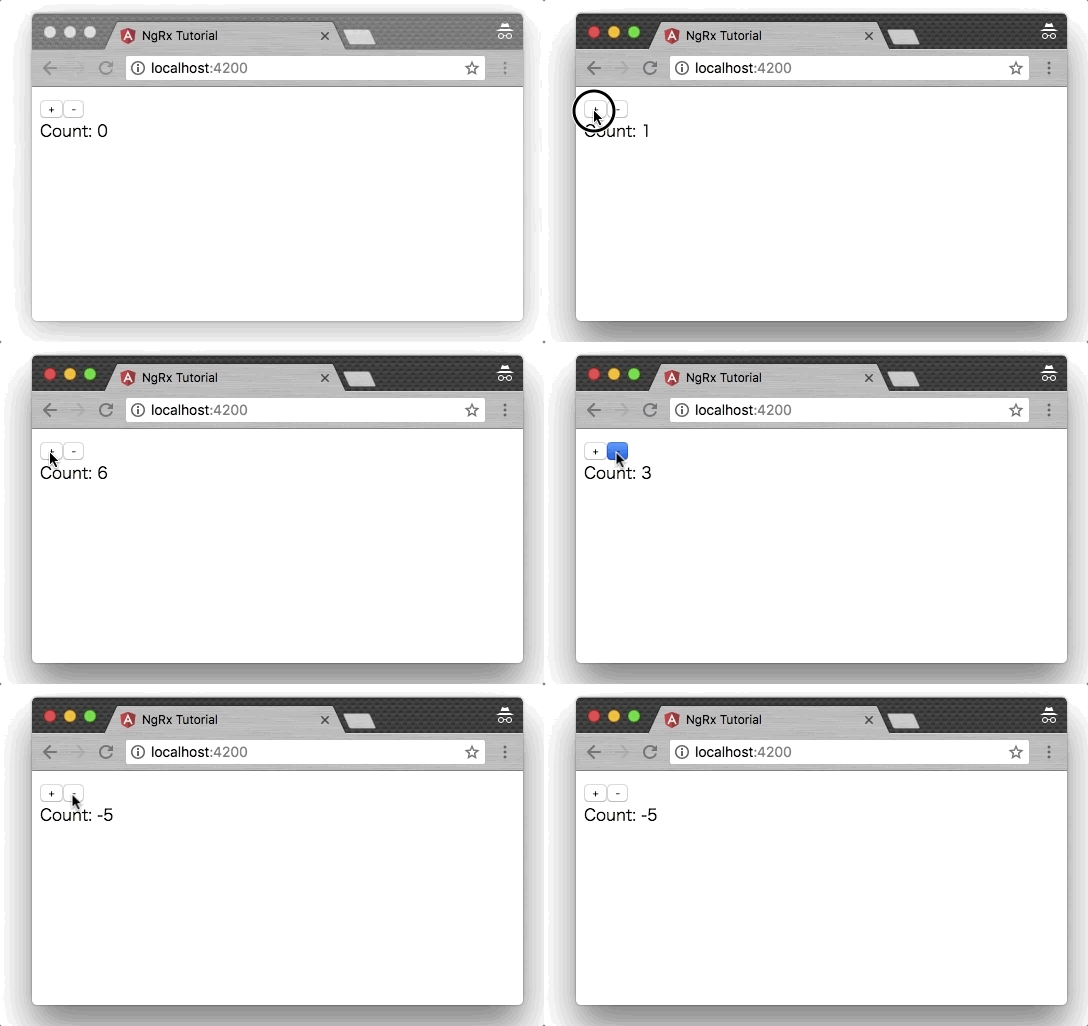
アプリの完成イメージ
やること/やらないこと
- やる
-
@ngrx/storeの使い方
- Storeの作り方
- Stateの作り方
- Reducerの作り方
- Actionsの作り方
-
@ngrx/schematicsの使い方
- オプションなどを使い極力手間を減らす方法
-
@ngrx/storeの使い方
- やらない (下記を理解するには参考のQiitaの記事を見てください。)
- 状態管理の説明
- Reduxの説明
- @ngrx/router-storeの使い方
- @ngrx/entityの使い方
-
@ngrx/effectの使い方
チュートリアル概要
段階を踏んで、ステップごとに動作確認しながら作成していきます。
各ステップ終了時点のソースコードはGitHubに用意しています。参考にしてください。
大部分はSchematicsを使ってngコマンドでボイラープレートを自動生成し、メイン部分のみ実装という感じです。
- Angularアプリを生成(1分) ※終了時点のソース
- ngrxを使わずにカウント処理実装(2分)※終了時点のソース
- ngrxインストール、初期設定(2分) ※終了時点のソース
- ngrxを使ってカウント処理実装(5分) ※終了時点のソース
前提条件
- Node.jsインストール済み
- Angular CLIグローバルインストール済み
$ npm i -g @angular/cli
- @ngrx/schematicsグローバルインストール済み
$ npm i -g @ngrx/schematics
1. Angularアプリを生成(1分)
- ng newコマンドを実行します。
$ ng new ngrx-tutorial
- 生成されたアプリ配下に移動し、一旦Webアプリを立ち上げてみます。
$ cd ngrx-tutorial
$ ng serve -o
2. ngrxを使わずにカウント処理実装(2分)
カウント処理の資産は全てsrc/app/counterフォルダ配下に作成します。
まずはコマンドラインからボイラープレートを作成し、その後カウント処理を実装します。
ボイラープレート作成
- カウント処理関連資産をまとめるモジュールを作成します。
- このモジュールをアプリ全体のモジュールに登録するため
--moduleオプションを指定します。
- このモジュールをアプリ全体のモジュールに登録するため
$ ng g module counter --module=app.module.ts
- カウント処理用のコンポーネントを作成します。
- 上記で作成したモジュールにコンポーネントを登録するため
--moduleオプションを指定します。 - 最終的にアプリ全体のモジュールにコンポーネントを登録するため
--exportオプションを指定します。
- 上記で作成したモジュールにコンポーネントを登録するため
$ ng g component counter --module=counter/counter.module.ts --export
-
app.component.html修正し、作成したカウント処理用のコンポーネントを呼び出すようにします。
<app-counter></app-counter>
- 一旦ここまででWebアプリを立ち上げてみます。
$ ng serve -o
- ブラウザが起動し、下記画面が表示されます。開発者ツールでエラーがなければ成功です。
処理実装
- カウント用コンポーネントで実際の処理を記述します。
import { Component, OnInit } from '@angular/core';

@Component({
  selector: 'app-counter',
  templateUrl: './counter.component.html',
  styleUrls: ['./counter.component.css']
})
export class CounterComponent implements OnInit {
  count = 0;

  constructor() { }

  ngOnInit() {
  }

  increment() {
    this.count = this.count + 1;
  }

  decrement() {
    this.count = this.count - 1;
  }

}
<button (click)="increment()">+</button>
<button (click)="decrement()">-</button>
<div>Count: {{count}}</div>
- ここまででWebアプリを立ち上げてみます。
$ ng serve -o
- ブラウザが起動し下記画面が表示されます。
+,-ボタンをクリックすると数字が増えたり減ったりした、開発者ツールでもエラーがなければ成功です。
3. ngrxインストール、初期設定(2分)
@ngrx/storeをアプリに導入し、初期設定をします。
- 下記ライブラリをインストールします。
-
@ngrx/schematics- Angualr CLIでngrxの雛形を作るためのライブラリ
-
@ngrx/store- ngrxでStore,Reducer,Actionを使うためのライブラリ
-
@ngrx/store-devtools- 強力なデバッカを使えるようにするためのライブラリ
-
$ npm i -D @ngrx/schematics
$ npm i -s @ngrx/store
$ npm i -s @ngrx/store-devtools
*@ngrx/schematicsをデフォルトのSchematicsに追加します(コマンドラインでngrxのボイラープレート生成時に@ngrx/schematicsの指定を省略できるようにするためです。)
$ ng config cli.defaultCollection @ngrx/schematics
- 上記を実行すると、
angular.jsonにこのような設定が追加されます。
  "defaultProject": "ngrx-tutorial",
  "cli": {
    "defaultCollection": "@ngrx/schematics"
  }
- ルートのStoreを作成します。
-
src/app/state配下に生成したいので--statePathオプションを指定します。 - アプリ全体のモジュールに登録したいので
--moduleオプションを指定します。
-
$ ng g store state --statePath state --root --module app.module.ts
- 上記コマンドで更新した
src/app/app.module.tsでenvironmentのimport文のパスでエラーが出ている場合は修正してください。
- import { environment } from '../../environments/environment';
+ import { environment } from '../environments/environment';
- ここまででWebアプリを立ち上げてみます。
$ ng serve -o
- 手順2の動作確認時と同様の挙動になります、開発者ツールでもエラーがなければ成功です。
4. ngrxを使ってカウント処理実装(5分)
ここからは実際にStore、Reducer、Actionを作成し、カウント処理の値をStoreに移行します。
ここで作成する資産はカウンター処理に閉じたものなので、src/app/counter/state配下に作成します。
また@ngrx/schemeticsのデフォルトではReducer、Actionなどの資産が、役割ごとにフォルダ分けされてしまいますが、1フォルダに集約したほうがソースが修正しやすいので、今回は全てsrc/app/counter/stateの直下に作成します。
ボイラープレート生成
- Store
-
src/app/counter/state直下に作成するため--statePathオプションを指定します。 - カウント処理関連モジュールに登録したいので
--moduleオプションを指定します。
-
$ ng g store counter/counter --statePath state --module counter.module.ts
- Reducer
- 上記で作成したStoreに本Reducerを登録したいため
--reducersオプションを指定します。
- 上記で作成したStoreに本Reducerを登録したいため
$ ng g reducer counter/state/counter --reducers index.ts
- Action
-
src/app/counter/state直下に作成するため--flatオプションを登録します。
-
$ ng g action counter/state/counter --flat
※この時点ではコンパイルエラーがでますので、動作確認はできません。そのまま次に進みます。
処理実装
依存関係の都合でボイラープレートとは逆順で実装していきます。
Action
ボイラープレート生成時から下記のように修正します。
※コメントはコードの説明なので無視して実装してください。
import { Action } from '@ngrx/store';

export enum CounterActionTypes {
// Actionごとに型を定義します。
-  LoadCounters = '[Counter] Load Counters'
+  CountIncrement = '[Counter] Increment Count',
+  CountDecrement = '[Counter] Decrement Count'
}

// Actionごとに@ngrx.storeのActionをインプリしたクラスを作成します。
// 複雑な処理をする場合はコンストラクタ引数をとりますが、
// 本チュートリアルでは簡単のため引数なしにしています。
- export class Counter implements Action {
-   readonly type = CounterActionTypes.LoadCounters;
- }
+ export class CountIncrement implements Action {
+   readonly type = CounterActionTypes.CountIncrement;
+   public constructor() {}
+ }
+
+ export class CountDecrement implements Action {
+   readonly type = CounterActionTypes.CountDecrement;
+   public constructor() {}
+ }


// 上記で定義したActionクラスを集約した型を定義します。Reducerで使うためです。
- export type CounterActions = LoadCounters;
+ export type CounterActions = CountIncrement | CountDecrement;
Reducer作成
import { Action } from '@ngrx/store';
+ import { CounterActionTypes } from './counter.actions';


export interface State {
// カウンター処理に置けるStateを定義します。
+   count: number;
}

export const initialState: State = {
// カウンター処理に置けるStateの初期値を定義します。
+   count: 0
};


export function reducer(state = initialState, action: Action): State {
  switch (action.type) {
// 引数として受け取ったActionの型に応じて処理を振り分けます
// ここではカウンター処理に関連するアクションのみ拾って、他はStateをそのまま返します。
+     case CounterActionTypes.CountIncrement:
// Stateを変更する場合は、Stateがイミュータブルになるように元のStateには変更を加えず
// Object.assingで新規オブジェクトを作るようにします。
+       return Object.assign({}, { ...state, count : state.count + 1 });
+     case CounterActionTypes.CountDecrement:
+       return Object.assign({}, { ...state, count : state.count - 1 });
    default:
      return state;
  }
}

// コンポーネントでStateのCountを取得するための関数を定義します。
// Storeの方にも定義しますが、ここでは本ファイルで定義している
// Stateのプロパティに関連する処理のみ定義します。
+ export const getCount = (state: State) => state.count;
- Store
import {
  ActionReducerMap,
  createFeatureSelector,
  createSelector,
  MetaReducer
} from '@ngrx/store';
// ng gコマンド生成時は相対パスがずれている可能性があるため
// その場合は修正する
- import { environment } from '../../environments/environment';
+ import { environment } from '../../../environments/environment';
import * as fromCounter from './counter.reducer';

export interface State {

  counter: fromCounter.State;
}

export const reducers: ActionReducerMap<State> = {

  counter: fromCounter.reducer,
};


export const metaReducers: MetaReducer<State>[] = !environment.production ? [] : [];

// コンポーネントでStateのプロパティを取得するための関数を定義します。
// 複数コンポーネントで使う度に定義するのは冗長なのでココで共通的に定義します。
+ export const getCounterFeatureState = createFeatureSelector<State>('counter');
+ export const getCounter = createSelector(getCounterFeatureState, s => s.counter);
+ export const getCount = createSelector(getCounter, fromCounter.getCount);
- Component
import { Component, OnInit } from '@angular/core';
+ import { Observable } from 'rxjs';
+ import { Store } from '@ngrx/store';

+ import * as CounterReducer from './state/counter.reducer';
+ import * as CounterActions from './state/counter.actions';
+ import { getCount } from './state';

@Component({
  selector: 'app-counter',
  templateUrl: './counter.component.html',
  styleUrls: ['./counter.component.css']
})
export class CounterComponent implements OnInit {
// Storeでの値変更を順次受け付けれるように型をObservableに変更します
-   count = 0;
+   count$: Observable<number>;

// Storeをインジェクションします
-   constructor() { }
+   constructor(private store: Store<CounterReducer.State>) {
// Storeからカウンタを取得します
+     this.count$ = store.select(getCount);
+  }

  ngOnInit() {
  }

  increment() {
// インクリメントの実処理はカウンタのReducerに任せるので
// ここではActionをdispatchするだけです。
-     this.count = this.count + 1;
+     this.store.dispatch(new CounterActions.CountIncrement());
  }

  decrement() {
-     this.count = this.count - 1;
+     this.store.dispatch(new CounterActions.CountDecrement());
  }

}
- ConponentのHTML
<button (click)="increment()">+</button>
<button (click)="decrement()">-</button>
<!-- 変数名と型が変わったのでHTMLも若干修正します -->
- <div>Count: {{count }}</div>
+ <div>Count: {{count$ | async }}</div>
- Webアプリを立ち上げてみます。
$ ng serve -o
- 開発者ツールなどで全くエラーが出ていなければ成功です。見た目は変わっていませんが、Countは
@ngrx/storeで管理されるようになっています。
補足:ストアとストア登録方法
ストアとストア登録処理はボイラープレートで生成するのでココで改めて説明します。
まずはルートのストアです。
ストアはsrc/app/state/index.tsに作成されます。
中身を見るとわかりますが、実態はReducerを集約したActionReducerMapです。
Reducerを新しく作成した時は、このマップにどんどん追加していきます。
import {
  ActionReducer,
  ActionReducerMap,
  createFeatureSelector,
  createSelector,
  MetaReducer
} from '@ngrx/store';
import { environment } from '../../environments/environment';

export interface State {

}

export const reducers: ActionReducerMap<State> = {
  // ココにReducerが追加されていきます。
  // 今回のチュートリアルではルートのストアに1つもReducerを定義していないので空っぽです。
};


export const metaReducers: MetaReducer<State>[] = !environment.production ? [] : [];
ストアをモジュールに登録するには下記のようにStoreModule.forRootを使います(ボイラープレートでやってくれます)
@NgModule({
  // ・・・
  imports: [
    // ・・・
    StoreModule.forRoot(reducers, { metaReducers }),
    !environment.production ? StoreDevtoolsModule.instrument() : []
    // ・・・
  ],
  // ・・・
})
export class AppModule { }
次にカウンタのストアに関してです。
こちらもルートの場合とほぼ同じです。
// ・・・
export const reducers: ActionReducerMap<State> = {
  // カウンタのReducerをマップに登録しています。
  counter: fromCounter.reducer,
};

export const metaReducers: MetaReducer<State>[] = !environment.production ? [] : [];
// ・・・
ただ登録はStoreModule.forFeatureを使います。
このメソッドは、機能毎に状態管理する時に使うもので、ルートのストアに指定した名前で登録されます。使う時になったら遅延ロードしてくれる機能を持っています。
// ・・・
import * as fromCounter from './state';
// ・・・
@NgModule({
  imports: [
    // ・・・
    // アプリ全体のストアにcounterという名前で登録します
    StoreModule.forFeature('counter', fromCounter.reducers, { metaReducers: fromCounter.metaReducers })
    // ・・・
  ],
  // ・・・
})
export class CounterModule { }
まとめ
以上で@ngrx/schematicsを使った@ngrx/storeのチュートリアルは終了です。
ngrxライブラリは他にも@ngrx/router-store、@ngrx/entity、@ngrx/effectがあるので、
今回のアプリをベースに拡張し、理解を深めてみるのも良いかもしれません。
AngularはVue.jsなどと比較するとボイラープレートが多くなってしまいます。
しかし、ソースコード自動生成機能が充実しているので、けっこう便利なフレームワークです!
あまり周りでAngular使ってる人がいなくて寂しいのですが、、、、皆さん是非Angular使いましょう!
参考
- GitHub
-
@ngrx/store
- 公式ページ。サンプルは少し古いですが、ドキュメントは充実しています。
-
@ngrx/schematics
- 各リンクに行くと、コマンドのオプションの説明などが記載されています。
-
@ngrx/store
- Medium
-
Managing State in Angular Applications
- Angularで状態管理する時のベストプラクティスを検討し、最終的に@ngrx/storeを紹介している記事です。ソースコードもGitHubにあり、大変参考になります。
-
Managing State in Angular Applications
- Qiita
-
@ngrx/storeと@ngrx/effectsの使い方
- GitHubにサンプルもありコード例が多く大変参考になりました。
-
@ngrx/schematicsを触ってみる
-
@ngrx/schematicsの使い方が網羅されており参考になりました。
-
-
ngrxでハマったポイント
- ngrx関連資産をstoreフォルダ配下に集約するという知見はココを参考にさせていただきました。
-
ngrx紹介
- ngrxを知るきっかけになった記事です。
-
@ngrx/storeと@ngrx/effectsの使い方


